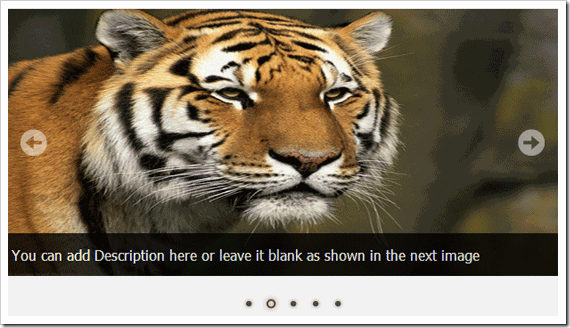
Last day I shared a simple tutorial which tells how to a create Slideshow For Blogger. Today we have yet another more advanced slider that has some awesome effects added to it. You can navigate between images and the slideshow has opacity plus slice image effects. All adds up just more spice to the slideshow. This slider is created bydev7studios.com and modified by us. Kindly have a look at the demo before we may start learning how to create this new Jquery slider.
Note: A More Updated version can be found here -> jQuery Image Slider For Blogger - V3
NB: If you have slow network connection then kindly have patience till the slideshow loads.
How to add the Slideshow to blogger?
The methods as usual are more easy than you can imagine. Follow up,
- Go To Blogger > Design
- Choose Add a Page Element
- Then choose HTML/JavaScript widget
- Inside the widget paste the code below,
<script src="http://ajax.googleapis.com/ajax/libs/jquery/1.4.2/jquery.min.js" type="text/javascript"></script>
<script src="http://nivo.dev7studios.com/scripts/nivo-slider/jquery.nivo.slider.pack.js" type="text/javascript"></script>
<script type="text/javascript">
$(window).load(function() {
$('#slider').nivoSlider();
});
</script>
$(window).load(function() {
$('#slider').nivoSlider();
});
</script>
<style>
#slider {
position:relative;
}
#slider img {
position:absolute;
top:0px;
left:0px;
display:none;
}
#slider a {
border:0;
display:block;
}
#slider {
position:relative;
}
#slider img {
position:absolute;
top:0px;
left:0px;
display:none;
}
#slider a {
border:0;
display:block;
}
.nivo-controlNav {
position:absolute;
left:260px;
bottom:-42px;
}
.nivo-controlNav a {
display:block;
width:22px;
height:22px;
background:url(https://blogger.googleusercontent.com/img/b/R29vZ2xl/AVvXsEgU0X2nKWHVR51vG2LbYcu-vNaz-Ch0reqNPlxELySsj3ME9QVR4BrZfHO1z47Bldg-W4Qmf4Vn6KI-3WZaiWmeOHl3fwhRyPiAVlB-RvfDSjCkBHu18YkCHBF7GSh-g9Kq5OguNkghdY4/s400/bullets.png) no-repeat;
text-indent:-9999px;
border:0;
margin-right:3px;
float:left;
}
.nivo-controlNav a.active {
background-position:0 -22px;
}
.nivo-directionNav a {
display:block;
width:30px;
height:30px;
background:url(https://blogger.googleusercontent.com/img/b/R29vZ2xl/AVvXsEiox-NSA6ja9Iuq4Ysw9ZObnOXqJHgt0pV72w7lDTOypaNGcExNpB1PfUXtsJc-JqMUI_QD7u81TfD5bB6S77SO0hmVEuxFi-TEPYsponWSCdXhdrQ8f5ltvXJOKczUUVdSGooLUTUGaos/s400/arrows.png) no-repeat;
text-indent:-9999px;
border:0;
}
a.nivo-nextNav {
background-position:-30px 0;
right:15px;
}
a.nivo-prevNav {
left:15px;
}
.nivo-caption {
text-shadow:none;
font-family: Helvetica, Arial, sans-serif;
font-size:16px;
padding: 10px 0px;
}
.nivo-caption a {
color:#efe9d1;
text-decoration:underline;
}
text-shadow:none;
font-family: Helvetica, Arial, sans-serif;
font-size:16px;
padding: 10px 0px;
}
.nivo-caption a {
color:#efe9d1;
text-decoration:underline;
}
.clear {
clear:both;
}
clear:both;
}
.nivoSlider {
position:relative;
}
.nivoSlider img {
position:absolute;
top:0px;
left:0px;
}
.nivoSlider a.nivo-imageLink {
position:absolute;
top:0px;
left:0px;
width:100%;
height:100%;
border:0;
padding:0;
margin:0;
z-index:60;
display:none;
}
.nivo-slice {
display:block;
position:absolute;
z-index:50;
height:100%;
}
.nivo-caption {
position:absolute;
left:0px;
bottom:0px;
background:#000;
color:#fff;
opacity:0.7; /* Overridden by captionOpacity setting */
width:100%;
z-index:89;
}
.nivo-caption p {
padding:5px;
margin:0;
}
.nivo-caption a {
display:inline !important;
}
.nivo-html-caption {
display:none;
}
.nivo-directionNav a {
position:absolute;
top:45%;
z-index:99;
cursor:pointer;
}
.nivo-prevNav {
left:0px;
}
.nivo-nextNav {
right:0px;
}
.nivo-controlNav a {
position:relative;
z-index:99;
cursor:pointer;
}
.nivo-controlNav a.active {
font-weight:bold;
}
</style>
position:relative;
}
.nivoSlider img {
position:absolute;
top:0px;
left:0px;
}
.nivoSlider a.nivo-imageLink {
position:absolute;
top:0px;
left:0px;
width:100%;
height:100%;
border:0;
padding:0;
margin:0;
z-index:60;
display:none;
}
.nivo-slice {
display:block;
position:absolute;
z-index:50;
height:100%;
}
.nivo-caption {
position:absolute;
left:0px;
bottom:0px;
background:#000;
color:#fff;
opacity:0.7; /* Overridden by captionOpacity setting */
width:100%;
z-index:89;
}
.nivo-caption p {
padding:5px;
margin:0;
}
.nivo-caption a {
display:inline !important;
}
.nivo-html-caption {
display:none;
}
.nivo-directionNav a {
position:absolute;
top:45%;
z-index:99;
cursor:pointer;
}
.nivo-prevNav {
left:0px;
}
.nivo-nextNav {
right:0px;
}
.nivo-controlNav a {
position:relative;
z-index:99;
cursor:pointer;
}
.nivo-controlNav a.active {
font-weight:bold;
}
</style>
<div id="slider">
<img src="URL Of Image" alt="" title="Description Goes Here" />
<img src="URL Of Image" alt="" title="Description Goes Here" />
<img src="URL Of Image" alt="" title="Description Goes Here" />
<img src="URL Of Image" alt="" title="Description Goes Here" />
<img src="URL Of Image" alt="" title="#htmlcaption" />
</div>
<!—Write Descriptoon With Links In this Part—>
<div id="htmlcaption" class="nivo-html-caption">
Cool na? :) Now Learn How to create one by <a href="http://masterbloggingtips.blogspot.com">Clicking here</a> </div>
<div id="htmlcaption" class="nivo-html-caption">
Cool na? :) Now Learn How to create one by <a href="http://masterbloggingtips.blogspot.com">Clicking here</a> </div>
<br/>
<br/>
How To Customize the Slider?
Of course its fun to customize it first using MBT HTML Editor :)
Replace URL Of Image with image link and Description Goes Here with any stuff that you may write. If you want to show no caption/description then simply deletetitle="Description Goes Here"
If you wish to add effects to text or use a link then use title="#htmlcaption" instead and then add your description as I have done after <div id="htmlcaption" class="nivo-html-caption"> . If you are finding this part difficult then let me know to which image do you want to add the effect. I will provide you with the code required.
Note: Please Note that you will need to use Images with equal sizes. The default size of all images used in this tutorial is 618 x 270. To learn how to adjust image sizes using Photoshop read this tutorial. Photoshop Image Editing Basics For bloggers
How To add More Images?
To add another image simply paste the code below just above </div>
<img src="URL Of Image" alt="" title="Description Goes Here" />
That’s it! Enjoy :)
BY Ashley Larrimore
*** ***


0 comments:
Post a Comment